DCA Installation Steps
imageOne’s DCA Summarized Installation Steps
- Uninstall from Programs and Features: HP JetAdvantage Management Connector.
If this doesn’t exist, please move to the next step. - Download the new DCA from one of these links: Windows Installer | Mac Installer | Linux Installer
- Run the installer, it is mostly next, next, next.
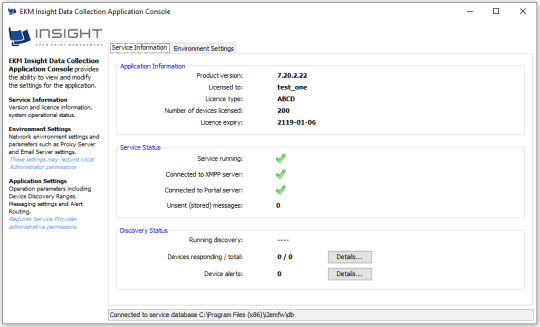
- Once installed, you will see an Initial Settings Window:

- The service provider code is predictiveinsights1 (lower case)
- On the next screen enter the unique key for the relevant monitor. Your unique license key has been provided to you within the Install Info form from the imageOne project manager assisting you with this hardware installation. Please email implementations@imageoneway.com if you cannot find it.
- The Installer will check internet connectivity and advise you of any issues.
- The next prompt should be to ask if you want to scan the default IP range, click YES.
- Click Finish.
- If all is successful you should see three green ticks like the above image, that means the install is complete and you can close the window.
Please note that if you get a red cross on XMPP, it is possibly a blocked port. This service requires port 5222 open for secure messaging communication. The TCP/IP outgoing connection is to IP 13.91.248.118 (cashmarkmsg) for the XMPP server on port 5222 and to IP 51.141.70.161 on port 80 for the license server.
If you have any questions, please feel free to contact us at 800.799.5377
